Here is the final render of "Santa, I Know Him".
Santa, I Know Him from randolfd on Vimeo.
Friday, December 14, 2007
Assignment 16 : "Guitarbite" Final Animation
AC/DC Monologue Extended from randolfd on Vimeo.
I'm not sure yet about the background color, but it works for now. Enjoy!
Wednesday, December 12, 2007
Assignment 15 : Test Render

For this piece, I wanted an ominous feel to add to the story, but in the end, after the monologue, we switch to our brightly lit future nursing home...a little touch of contrast to brighten the piece.
Assignment 16 : Test Render

This is my first pass at a simple environment and render for this scene. I wanted to suggest a department store in a simple way so the the characters stand out. I like how this looks so far.
Wednesday, December 5, 2007
Sunday, November 25, 2007
BBC Motion Gallery
I colleague of mine forwarded a nice resource to me. It features showcases footage that animators can use as reference for their animations. One of the things I like the most, is that you can download the clips on to your desktop as quicktime movies, where you can step the frames for viewing. Check it by clicking the picture below!

Sunday, November 18, 2007
Saturday, November 17, 2007
Thursday, November 15, 2007
Assignment 16 : Character Monologue 1
Below is a blocked in test of my monologue. I'm thinking about possible environments for background and came up with a few: a future nursing home, a hangar of star pilots, a park.
Monday, November 12, 2007
Assignment 15: Push Pull Final Render I
This is almost done. In looking at this now, there are many things that still need fixing. These are listed below:
Place spotlights outside the door to simulate a delivery vehicle.
Flicker to the candle lights.
Remove some of the movements to simplify the action.
Sliding feet when he pulls.
Parent hand controls moving object.
Add a pizza logo texture to pizza box.
Wednesday, November 7, 2007
Assignment 15 UPDATE: Pushing & Pulling
This animation is due this week and attached is my latest progress. The animation is turning out much longer than anticipated and I see many ares that can be smoothed out a great deal, using the graph editor, and I still have to refine the hand positioning.
I was able to block in the pizza, and a back turn. Its one of those things that you have to put away for a while so you can look at it objectively with fresh eyes in the morning.
I was able to block in the pizza, and a back turn. Its one of those things that you have to put away for a while so you can look at it objectively with fresh eyes in the morning.
Assignment 15: Lighting Test


Before I conduct a final render on this animation, I thought I'd add lights to add to the mood. Of my various tests, I like these the most.
Tuesday, November 6, 2007
Assignment 15 : Animation & Music are the Same
Regarding the Igor animation below, Dori, one of my advisors recommended I see animation and music as being the same. The sound clip offers a good example of this and its something to keep in mind when I work. Igor's travelling movements should be fast and his pulls should be slow, the concept is similar to what is demonstrated in the soundclip below. Both animation and music benefit a great deal with the addition of color (variety and contrast) to the overall composition.
Sunday, November 4, 2007
Assignment 15 : Pushing and Pulling Animation Update
Here is the latest. The animation is longer than I had originally expected, but I'm liking the way its looking, so I'm devoting one more week. I've adjusted the timing throughout. I need to animate the end and yes, I'm stil going with the pizza idea. Up to this point, I've gotten really familiar with the dope sheet. I hope to post the completed piece here once it is complete.
Things to Fix:
Things to Fix:
- Slow the pulls and pushes to contrast his movement from one place to another.
- Consider pushing with his back during the first push.
- Too floaty in the beginning.
- Open hands before grabs.
- Adjust hands to hold the ring.
- Too much head movement.
- More frames during first jump.
Tuesday, October 23, 2007
Assignment 15 : Body Mechanics / Pushing Pulling Animatic
Here's my first pass at this animation. Learning from the previous project, I need to stagger my timing more, by adding more slow movement to contrast with the quick movements. I'm also thinking about getting rid of the pizza idea and just having Igor run out of the door, but in looking at it again, I really like the payoff.
Assignment 15 : Body Mechanics / Pushing Pulling

Assignment 15:
Animate a character engaged in a sport, or have him push or pull something.
Here is a storyboard breakdown of what I had planned.
Assignment 14 Update : 4 Emotion / Gear Change
I learned a lot in this assignment. Technically, I got used to animating using the "bookend" technique, which places two of the same keyframes spaced about 12 frames apart. The action is placed in between in order to control the animation process.
I also learned the value of planning and simplicity. The ability to be able to break down the animation to its key components, enough to be able to count what you are wanting to animate on your hand, greatly simplifies the process and makes things clearer. Why do I need to write this? Because ambition gets the best of us. We want to do well, and therefore, doing more than what's expected, even though the intention is good, we lose sight of what we are trying to do.
Here's the latest. I think it plays a little fast, and I'd like to slow down the peak-through at the end.
Saturday, October 13, 2007
Assignment 14 or 12 : Gear Change 2 or Animating 4 Emotions
Animating 4 Emotions from randolfd on Vimeo.
This original assignment was to animate a second gearchange different from the first. In all of these assignments, its extremely easy to get too carried away, and to animate more than is needed. Its by far the most difficult thing to overcome that I think will get better through experience. The most simple way to prevent this is through planning.
For this assignment, instead of two emotions, the character is now experiencing 5 emotions: sadness, surprised, fear, inquisitiveness and happiness, followed by pain. I was too deep into the animation before I realized I had done too much. I think its a good example of the 4 emotion assignment that I am supposed to undertake in the next few weeks.
Some tips for this successful completion of this assignement:
Research:
Think of a funny incident that has happened to you, and act it out in front of a video camera. You will use this as reference, and you will watch it step by step so you can get a realistic idea of the timing involved, as well as little nuances in the acting that will give the performance variety and realism.
Planning:
Be sure you are clear which emotions are being portrayed, write these down and stick to them.
Stepping:
Pose your rig in the timeline, making sure that you hold each pose by placing two identical keyframes to hold the pose. 48 frames is a good duration for a pause. Shorter pauses should be 24 frames. These pauses act as periods in the performance which gives the viewer a split second to understand what is going on. In Maya, step these performance so you have a rough idea of timing.
To step your keyframes:
Shift + LC drag you mouse over the frames you want (they should be highlighted red) > RC > Tangents > Stepped.
Animating:
After posing, begin to animate the spine and center of gravity from one emotion to the next. In traditional stage drama, it is part of an actor's training to express oneself from the inside out. In animation, we'll do something similar, let's animate the spine and center of gravity first before doing the limbs and head. This technique adds a natural moving pause to your movement (moving pause link here).
After you have animated the spine, torso and center of gravity, begin to animate the limbs and head. In animating the arm, animate the upper arm first, followed by the elbow, then wrist rotation. At this point, you are animating follow through and overlapping animation, which will make your piece look more realistic.
At this point, its essential to remove the stepping from your playback so you have a better idea of how things are turning out.
Finishing Touches:
Be sure to check your work and seek feedback to improve our work. After more finishing touches, use the graph editor to smooth your animation and to refine your arcs.
Tip:
One thing to keep in mind while animating, is to add a variety of speeds in your animation. Mix fast movement with slow movement. This adds contrast and visual interest to your piece. A good example of this is explained in Victor Navone's blog on Animating 3 speeds.
Click the link below to explore more:
http://www.navone.org/blogger/2007/09/3-speeds.html
Saturday, September 22, 2007
Animation Mentor

Animationmentor.com is an online animation school taught by industry professionals. The demoreel featured on their site of student work from 2007 is exceptional. It shows what can be done through the animation of simple shapes and the implementation of basic animaiton principles.
http://www.animationmentor.com/index.cfm
Friday, September 21, 2007
Movement for Actors (Notes)
I'm currently reviewing a book called "Movement for Actors" edited by Nicole Potter. I'm hoping to glean lots of information from the text and will place here in the entry what I feel could be used for animators.
“Movement for Actors” as described best by the quote on the reverse side of the book,
“The most complete survey to date of the available physical components of modern actor training. Invaluable.” George Morrison, President, The New Actors Works, Emeritus Professor SUNY-Purchase.
The book has a lot of great information regarding body movement and this translates emotion. It covers drama and stage techniques by Chekhov, Laban and even has a small section on the acting styles of Keaton and Chaplin.
I wanted to review the book to see if I could find anything that would help animators convey emotion in their characters. I found many of the techniques in the book to be drama, stage and dance centered. The descriptions of which were abstract and I wasn’t sure if an animator would find this information helpful. If an animator chooses, he or she could check the text out themselves.
I did however find a few sections interesting. They are listed below as well as my notes on for each section for further study.
Michael Chekhov (18):
An early 20th century actor originated the acting principles of stoccato and legato, contraction and expansion. The actor is to relax and to familiarize himself with how his entire body is reacting to these conditions. Exercises like this connect the mind to the body. In acting, if there is a disconnect, we have overacting or stiff performances.
Still Movement:
Even though there is no movement, if an actor feels the emotion from within, the emotion should radiate. The actor thus becomes a living shape. Here, pauses become loaded with emotion as suggested by the viewer’s imagination.
Character Archetypes:
When acting, think of the character archetype and the role that this character is in. Identify the core of the character first. Play this role first and add personality traits later. Like sculpting, you want to get the general proportions first, before going to fast into the detail.
These unique personality traits should come from your imagination and from your experiences as a human being.
As the character ask, “What Do I Want”, and pay attention to what the body says. Relax and pay attention to the impulses that arise. This could lead to gestures, more specifically, when rehearsed, core gestures. These should be practiced, and if you are animator, begin recording reference after you have practiced.
If one cannot get into the gesture, there may need to be an adjustment of the gesture itself, or the body is not sufficiently prepared form lack of research or stress.
BELIEVABILITY & EMOTIONAL CONNECTION:
Kinesthetic Awareness:
Be aware and act naturally to your surroundings, be aware of impulses or signals your body gives you. Be observant of what your hands do in any situation.
Sensory Awareness:
Your five senses will pick things up from the environment, what are they doing. By observant, you can put these nuances into a performance.
Proprioceptive Awareness:
Refers to the expression by the entire body, not just the hands and face. This section also talks about habits that we as actors get into and that we must break from in order to stay away from overacting (230).
RANGE & EXTERNAL CHARACTER DEVELOPMENT:
Posture and Gesture:
The actor should change from the floor up. Create movement from the hips and leg stance thinking that the body is the decoration. “We lie with our face and hands. We are the shape of our spine and our legs”. This quote is profound the idea actually helped me in animating my last assignment, but focusing on animating the core and spine first.
Tension:
Inevitably linked to posture. The link between your posture and the scene is imperative. An actor becomes great when he uses his posture to communicate in a scene. Exercise: How many poses can one do while washing dishes, or holding a fork?
Space and Shape:
As an actor, be mindful of your shape (silhouette) and your relation to the camera.
Rhythm:
Maxheadroom is an example of overaggerated dramatic rhythm. Exercise: While listening or reciting lines, try to establish a rhythm with your hand or an inanimate object. Establishing a rhythm creates a tempo that a viewer can follow (233).
Eye Head Relationships:
Drama in oriental cultures place a great emphasis on the eyes. Eyework must be practiced. A great example of this is Anthony Hopkins in Silence of the Lambs.
THEATRICAL STILLNESS:
As a society, there is an enduring fascination with stillness (27). It can express: calm, meditation, rigidity, exhaustion and or panic.
Think of stillness as pauses between the different emotions, this allows for the viewer to digest what is happening, it gives clarity and meaning to the performance to the relationships.
Adding pauses offers rest at the end of the thought and it permits the transitional moment to the next scene or line.
Too much stillness creates an uneasy effect.
TEACHING CHAPLIN HOW TO WALK:
Posture and Movement:
Difference between the two actors – Chaplin walked with is head aligned with his spine. Keaton, lead with his head. Subtle differences like this added to character. Running offered more insight and magnified the characters more.
Body Shape:
Chaplin was an ectomorph, someone characterized by seeming to be delicate or nervous. Our attention is drawn to their eyes, hands and feet.
Endomporphs: Larger, sluggish and powerful, where movement seems to come from within. Characters such as John Candy and Orson Welles are good examples of this.
Mesomorphs:
Keaton was of this body type, usually characterized by the “He – Man” archetype.
Both of these characters used their physiques to convey character. In the book it also pointed something that I believe could be important to an animator and that is that Chaplin moved in circular patterns.
In both cases, Keaton and Chaplin were masters at creating interesting silhouettes and shapes. From far away or long shots, the characters’ eyes and body forms would be readable.
Potter, Nicole. "Movement for Actors". New York. Allworth Press. 2002
FURTHER STUDY:
Rhythm in animation.
Example Demo Reel

My instructor Yu-Ting posted his demo reel on Youtube. I liked how he showcases his rigging skills through screen captures, something I'm currently exploring. Thanks for posting.
The link to his demo reel is below:
http://www.youtube.com/watch?v=YzRLcPPdMis
Wednesday, September 19, 2007
Free Maya Character Rigs
In order to complete the following exercises featured in this thesis, you will need a rigged character model that is capable of full body and facial movement. A good place to download a variety of character rigs can be found on the High End 3D site, it features free rigs to be used for animators of the following platforms: 3DS, Maya, XSI and Renderman. I've already tested the rigs below, some made the list and some did not, the ones below worked well. I also thought it might be helpful to post the two second tests of each rig to give users a better idea.
Please note that the following rigs have been reviewed under the Maya platform. Happy animating.
Basic Guy
by Tim Oberlander
homepage: http://www.timoberlander.com
download: http://www.highend3d.com/maya/downloads/character_rigs/Basic-Guy-4284.html

Basic Guy Test Animation from randolfd on Vimeo.
Chip
by: Anders Fray
http://www.AndersFray.com
http://www.highend3d.com/maya/downloads/character_rigs/Chip-4446.html

Chip Rig Animation Test from randolfd on Vimeo.
Andy Rig
By: Models and Rig by John Doublestein, Design by Craig Scheuermann, Textures by Ying-Chih Chen. Some rigging techniques inspired by Jason Schliefer, Aaron Holly, Javier Solsona, Michael Comet and Hamish McKenzie
http://www.highend3d.com/maya/downloads/character_rigs/The-Andy-Rig-4697.html

Andy Rig Test Animation from randolfd on Vimeo.
Max
by James Hunt
download: http://www.highend3d.com/maya/downloads/character_rigs/Max-for-Maya-4877.html

Max Rig Animation Test from randolfd on Vimeo.
Tiny
by Chad Vernon
homepage: www.chadvernon.com
download: http://www.highend3d.com/maya/downloads/character_rigs/Tiny-4578.html

Tiny Animation Rig Test from randolfd on Vimeo.

Packageman
Javier Solsana
homepage: http://www.rigging101.com
download: http://www.highend3d.com/maya/downloads/character_rigs/PackageMan-4688.html
Boris with Facial Rig
by James Stone
homepage: http://www.jamesstone.co.uk/
download: http://www.highend3d.com/maya/downloads/character_rigs/Boris-with-Facial-GUI-4659.html

Boris Rig Animation Test from randolfd on Vimeo.

T-Rex 1.0
ssnohv
download: http://www.highend3d.com/maya/downloads/character_rigs/T-Rex-ma-4606.html

Flour Sac Character
homepage: http://www.timoberlander.com
download: http://www.highend3d.com/maya/downloads/character_rigs/-Flour-Sack--Character-4330.html

Alexia with Face Controls
download: http://www.highend3d.com/maya/downloads/character_rigs/Alexia-Body-w-Adv-Facial-Controls-Rig-4570.html

Grasshopper 2.0
by Harun Aydin
homepage: http://www.vertigo.com.tr
download: http://www.highend3d.com/maya/downloads/character_rigs/Grasshopper-4561.html
Devil
by Model by Rahul Mehta -
Rig by Harshad Bari -
download : http://www.highend3d.com/maya/downloads/character_rigs/DEVIL-4457.html

Devil Test Rig from randolfd on Vimeo.

Moom
by Ramtin Ahmadi
download: http://www.highend3d.com/maya/downloads/character_rigs/MooM-version-3-4346.html
Ollie 1.5
homepage: http://www.jugglersanimation.com/
download : http://www.highend3d.com/maya/downloads/character_rigs/Ollie-4466.html

Ollie Rig Test from randolfd on Vimeo.

Generi "Blue Guy" Rig
by Andrew Silke
homepage: http://www.andrewsilke.com
download: http://www.highend3d.com/maya/downloads/character_rigs/Generi--Blue-guy--rig-4288.html
Lowman
homepage: http://www.animationapprentice.com
download: http://www.highend3d.com/maya/downloads/character_rigs/Lowman-rig-with-face-blendshapes-4304.html

Lowman Character Rig Test from randolfd on Vimeo.
Please note that the following rigs have been reviewed under the Maya platform. Happy animating.
Basic Guy
by Tim Oberlander
homepage: http://www.timoberlander.com
download: http://www.highend3d.com/maya/downloads/character_rigs/Basic-Guy-4284.html
Basic Guy Test Animation from randolfd on Vimeo.
Chip
by: Anders Fray
http://www.AndersFray.com
http://www.highend3d.com/maya/downloads/character_rigs/Chip-4446.html
Chip Rig Animation Test from randolfd on Vimeo.
Andy Rig
By: Models and Rig by John Doublestein, Design by Craig Scheuermann, Textures by Ying-Chih Chen. Some rigging techniques inspired by Jason Schliefer, Aaron Holly, Javier Solsona, Michael Comet and Hamish McKenzie
http://www.highend3d.com/maya/downloads/character_rigs/The-Andy-Rig-4697.html
Andy Rig Test Animation from randolfd on Vimeo.
Max
by James Hunt
download: http://www.highend3d.com/maya/downloads/character_rigs/Max-for-Maya-4877.html
Max Rig Animation Test from randolfd on Vimeo.
Tiny
by Chad Vernon
homepage: www.chadvernon.com
download: http://www.highend3d.com/maya/downloads/character_rigs/Tiny-4578.html
Tiny Animation Rig Test from randolfd on Vimeo.
Packageman
Javier Solsana
homepage: http://www.rigging101.com
download: http://www.highend3d.com/maya/downloads/character_rigs/PackageMan-4688.html
Boris with Facial Rig
by James Stone
homepage: http://www.jamesstone.co.uk/
download: http://www.highend3d.com/maya/downloads/character_rigs/Boris-with-Facial-GUI-4659.html
Boris Rig Animation Test from randolfd on Vimeo.
T-Rex 1.0
ssnohv
download: http://www.highend3d.com/maya/downloads/character_rigs/T-Rex-ma-4606.html
Flour Sac Character
homepage: http://www.timoberlander.com
download: http://www.highend3d.com/maya/downloads/character_rigs/-Flour-Sack--Character-4330.html
Alexia with Face Controls
download: http://www.highend3d.com/maya/downloads/character_rigs/Alexia-Body-w-Adv-Facial-Controls-Rig-4570.html
Grasshopper 2.0
by Harun Aydin
homepage: http://www.vertigo.com.tr
download: http://www.highend3d.com/maya/downloads/character_rigs/Grasshopper-4561.html
Devil
by Model by Rahul Mehta -
Rig by Harshad Bari -
download : http://www.highend3d.com/maya/downloads/character_rigs/DEVIL-4457.html
Devil Test Rig from randolfd on Vimeo.
Moom
by Ramtin Ahmadi
download: http://www.highend3d.com/maya/downloads/character_rigs/MooM-version-3-4346.html
Ollie 1.5
homepage: http://www.jugglersanimation.com/
download : http://www.highend3d.com/maya/downloads/character_rigs/Ollie-4466.html

Ollie Rig Test from randolfd on Vimeo.
Generi "Blue Guy" Rig
by Andrew Silke
homepage: http://www.andrewsilke.com
download: http://www.highend3d.com/maya/downloads/character_rigs/Generi--Blue-guy--rig-4288.html
Lowman
homepage: http://www.animationapprentice.com
download: http://www.highend3d.com/maya/downloads/character_rigs/Lowman-rig-with-face-blendshapes-4304.html
Lowman Character Rig Test from randolfd on Vimeo.
Sunday, September 16, 2007
Assignment 9 : Creating a Demoreel
Assignment 9 : Demo Reel from randolfd on Vimeo.
Assignment 9:
- Create a demo reel with your examples thus far. Some tips:
- Start with your best work
- Add music that is nonspecific, for the above track, I used Soundtrack Pro. Its a program that has lots of beats and instruments and anyone can create a track that is royalty free and unique.
- Watch for timing and theme
- When creating a professional reel, include playblasts and not fully rendered scenes. Make the viewer see only your animation and do not give them a reason to critique your texture and lighting.
- In your demo reel, do not put the bouncing ball. It labels you "Student".
Thesis Part I Completion : Moving Forward
I went through the quarter taking a character animation class, in which we engaged in exercises that when taken in sequence would eventually build skill in animating character emotion.
These were the exercises accomplished this quarter and have been posted in this blog:
The question I encountered this week, is what should the next exercises be. In my thesis proposal, I had planned to do two major assignments that would be developed next quarter, dialogue with a single character, then dialogue between two characters.
I spoke to the animation instructor about it and he felt the dialogue exercises should be last, and that more should be done before being attempting dialogue. These exercises should be attempted below but in an 11 week it might be difficult to teach this to students. An alternative would be teach and develop a curriculum spanning 2 quarters (22 weeks).
These would be the animation assignments I have slated for next quarter.
As an example, please see Rebecca Perez' demo reel, it features many of the assignments mentioned above and its a good example of what I'm striving for. She's a Disney Animator (perhaps Dori knows her) and she accomplished these exercises through the Animation Mentor class.
http://www.wik-id.com/reb/AM/Class2/A12/ALLanims_sm.mov
and
http://www.wik-id.com/reb/AM/Class1/A12/AM_Class1_Anim_comp_sm.mov
I'm wondering what feels the best to you as far as which assignments to go forward with. What do you guys think?
Thanks,
Randolf
These were the exercises accomplished this quarter and have been posted in this blog:
- bouncing ball
- 2 bouncing balls with differing weights
- drink box
- walk cycle
- run cycle
- pantomime
- hip turn
- one emotion
- gear change - two emotions
- creating a demo reel.
The question I encountered this week, is what should the next exercises be. In my thesis proposal, I had planned to do two major assignments that would be developed next quarter, dialogue with a single character, then dialogue between two characters.
I spoke to the animation instructor about it and he felt the dialogue exercises should be last, and that more should be done before being attempting dialogue. These exercises should be attempted below but in an 11 week it might be difficult to teach this to students. An alternative would be teach and develop a curriculum spanning 2 quarters (22 weeks).
- another gear change assignment of different emotions (2 weeks).
- an animation showing 4 emotions (these two would be blocked in pantomimes in the beginning) 3 weeks.
- a body mechanics animation (ie. a character jumping off of a high place or picking up a heavy object). 1 week
- Pantomime animation with 2 people. (1 week)
- Dialogue animation assignment with 1 person. (2 weeks)
- Dialogue animation assignment with 2 people (not sure if there's time for this one - 2 weeks).
These would be the animation assignments I have slated for next quarter.
As an example, please see Rebecca Perez' demo reel, it features many of the assignments mentioned above and its a good example of what I'm striving for. She's a Disney Animator (perhaps Dori knows her) and she accomplished these exercises through the Animation Mentor class.
http://www.wik-id.com/reb/AM/Class2/A12/ALLanims_sm.mov
and
http://www.wik-id.com/reb/AM/Class1/A12/AM_Class1_Anim_comp_sm.mov
I'm wondering what feels the best to you as far as which assignments to go forward with. What do you guys think?
Thanks,
Randolf
Assignment 8 : Gear Change II
Assignment 8 : Gear Change Assignment from randolfd on Vimeo.
Critique:
- Watch for the rotation of the hip. Adjust this to create a better line of action within the character's spine.
- Get more of sway in the spine by animating the root, and having the rest of the body overlap, followed by head sway and arms.
- Get more of the "jacked up" in the main keyposes and do not don distort the figure too much.
Observations / Things to watch out for from the rest of the class:
- When animating overlap, animate the spine, head then arms. Hide these layers so can focus on each individually.
- When animating emotion, make sure we see the character realize the event..pause...then have the charater react.
- Watch for twinning in poses.
- Add moving holds. In poses where there could be a definite pause, other parts of the body should move as well.
- Add more anticipation.
- Make sure silhouettes are readable.
- Animate the scene for emotion, not just movement.
- The hardest task is to simplify the action to its essential elements. Animating a 22 second animation in a week will make for a weak animated piece.
- The character is always looking for or thinking of something.
Wednesday, September 5, 2007
Shaun Freeman Site

Animator Shaun Freeman has a nice page full of animation tips and tricks. Definitely worth checking if you'd like to improve your work. Below is a sample of some of the topics he discusses.
http://www.shaunfreeman.com/animating_tips/index.htm
- Using live reference.
- Moving holds
- Animating to the camera
- Animation Flowcharts
- Refing your work (I liked this one a lot)
- Characterization
- Blocking in Dialogue
Thanks for posting Shaun.
Tuesday, September 4, 2007
MIDTERM : Run Cycle
Igor Run Cycle from randolfd and Vimeo.
This assignment was given week 5, almost like an animation test. Students had two hours to complete the assignment.
Assignment 9 : Movie Pose Sketching Assignment
In this assignment, the student is to watch movies from various genres and is to sketch/capture the poses that make the scene work. The best movies to watch for this assignment are your 1920's silent films as their performances were based on body language clarity, timing and form. Below are some examples:


Sunday, September 2, 2007
Saturday, September 1, 2007
List of Emotions
- Happy
- Angry
- Sad
- Surprised
- Excited
- Anxious
- Inquisitive
- Embarrassed
- Drunk
- Confused
- Sick
- Tired
- Loved
- Daydreamy
- Rage
- Depressed
- Irritated
- Constipated
- Inspired
- Annoyed
- Disturbed
- Bossy
- Groggy
Assignment 8 :: Gear Change
Animate a character showing one emotion, have him experience an event or conflict at which point he shifts to another emotion.
Due next week, stepped key pose of this assignment.
The example below is great example.
Due next week, stepped key pose of this assignment.
The example below is great example.
Assignment 2 : Animating Differences in Weight
Animating 2 Different Weights from randolfd and Vimeo.
In this assignment,we were to animate two balls to show differences in weight, and material. There's a little hitch / blur effect that occurs twice, once at the end of the first ball's bounce and second, when the big ball scares the small ball. I gotta check out the graph editor.
Assignment 7 : Animating One Emotion CRITIQUE
Animating One Emotion: Magrite Gout from randolfd and Vimeo.
Below is a critique from Samir Patel from Rhythm and Hues and Ruel Pascual for this exercise. The video is posted in this blog using vimeo. Let's see how things go as I'd like to post my animation examples on this blog for further viewing.
- Watch the pose distortion. Although this is good for exaggeration, be careful that you don't the bend the character so much that its out of character.
- Keep movement simple. In my animation, there are two poses, one to recognize the foot, and one to show emotion of the pain. The way I have it makes both poses unclear.
- Don't animate too much upper body or else won't see the foot.
- Incorporate a pause between these two poses so the audience can see them (the gesture and the pose).
- Use both hands to hold leg.
- Watch plant foot, establish balance.
- Establish a rhythm in the foot growth similar to a heart, instead of slowing growing. Adding a heart beat throb would emulate what happens in the body.
- Be sure the pose and silhouette reads clearly.
- Pay attention to overlapping action and follow through to prevent jerky movement.
- Establish the general movement and timing for the main shape. In may cases its the ball that is the root of the character. Establish this timing and everything else (arms and legs) should follow.
- What is the goal of the character? This leads to action.
- Ease In and Ease Outs and be sure to lock IKs.
- Break the movements down into sections and add pauses so that each movement is clear for the viewer.
- Be sure character has balance.
- Watch for broken or contorted poses which change the character.
- Always time the root of your character first.
- Watch for twinning in the poses.
- Push C and S curves in the poses. Whenever you have a spine moving straight up and down, you will always have stiff animation.
- Don't be afraid to exaggerate, you can always pull it back.
- Add "drag" in the limbs or face.
- Everythng in the body must move....moving hold.
Wednesday, August 29, 2007
Assignment 7 : Animating One Emotion
Homework: One Emotion Exercise
A pantomime exercise! No dialog and no moving cameras.
Animate a character showing one emotion
Use the Magritte character rig, props are okay
4 seconds max in 24 fps... make it straight and to the point
Make sure you go through the steps. Pose to Pose.
Quicktimes due beginning of class.
"Remember what Ed Hooks said about adreneline moment... that character will remember that moment forever.
Think of an emotion and figure out how to express that emotion in a few poses well 4 seconds.
You can use minimal props if you have too. Remember the example I said last week? a biker wining a race and raising his hands with joy."
"He's gonna remember that race forever. Think of a very fond memory (emotion) that you can use for the animation." - Ruel
Assignment Week 6: Pantomime & Hip Turn
Had problems with my foot last week, so I'm behind in these assignments. Feeling much better this week...here we go.
Assignment 1:
Take Magritte (Ruel's rigged character), pose him expressing 6 different emotions, step it and publish it as a quicktime. Watch for exaggeration, silhouette clarity and expressiveness of emotion. Ruel's notes on this assignment are below and can be see by following this link
2.The Animation Process of Pose to Pose
The quickest and most efficient way to animate!
-Thumbnailing your ideas, scene, emotions, or shot
-Act it out... shoot video reference
-Block in Key Poses (storytelling poses) in Stepped Key Tangents
-Block in Breakdown Keys
-Check for Arcs, Timing, Beats, Phrasing
-Convert to Linear Keys
-Adjust Timing and Spacing
-Convert to Spline Keys
-Clean up animation from the Inside/Out...
-Start with the root, hips, spine, neck, head, shoulder, arms, hands, legs, feet.
-Lock down IKs, Timing, Ease In/Ease Outs, Moving Holds, Arcs, Overlap, Secondary Action,
Check for Twinning Poses
-Animate Facial Poses or Lip Sync Animation
-Start with Eyes, Eye Brows, Mouth, Tongue, Cheeks, Nose, Ears, Hair
Assignment 2:
Use the moon character rig, and animate the hip and legs doing a 180 degree turn. Things to watch out for modify the step poses/positioning used in the walk cycle, weight shift, foot placement, arcs and hip positioning (x and z). Ruel's notes on this assignment are below:
-Does it have weight?
-Moving Holds
-Anticipation
-Root/Center of mass action
-Contact Pose, Passing Pose, Push Off Pose
-Arcs
-Clean Silhouette
More information about weight shifts, moving holds and anticipation can be found here:
http://www.visualfulfillment.com/index.php?option=com_content&task=view&id=195&Itemid=34
Terms of the week:
-Timing
-Arcs
-Contact Pose
-Down Pose
-Passing Pose
-Push Off Pose
-Up Pose
-Twisting of Spine
-Overlap
-Slow in Slow Out
-Stride Length
-Beginning and End Pose
-Loop
Assignment 1:
Take Magritte (Ruel's rigged character), pose him expressing 6 different emotions, step it and publish it as a quicktime. Watch for exaggeration, silhouette clarity and expressiveness of emotion. Ruel's notes on this assignment are below and can be see by following this link

2.The Animation Process of Pose to Pose
The quickest and most efficient way to animate!
-Thumbnailing your ideas, scene, emotions, or shot
-Act it out... shoot video reference
-Block in Key Poses (storytelling poses) in Stepped Key Tangents
-Block in Breakdown Keys
-Check for Arcs, Timing, Beats, Phrasing
-Convert to Linear Keys
-Adjust Timing and Spacing
-Convert to Spline Keys
-Clean up animation from the Inside/Out...
-Start with the root, hips, spine, neck, head, shoulder, arms, hands, legs, feet.
-Lock down IKs, Timing, Ease In/Ease Outs, Moving Holds, Arcs, Overlap, Secondary Action,
Check for Twinning Poses
-Animate Facial Poses or Lip Sync Animation
-Start with Eyes, Eye Brows, Mouth, Tongue, Cheeks, Nose, Ears, Hair
Assignment 2:
Use the moon character rig, and animate the hip and legs doing a 180 degree turn. Things to watch out for modify the step poses/positioning used in the walk cycle, weight shift, foot placement, arcs and hip positioning (x and z). Ruel's notes on this assignment are below:
-Does it have weight?
-Moving Holds
-Anticipation
-Root/Center of mass action
-Contact Pose, Passing Pose, Push Off Pose
-Arcs
-Clean Silhouette
More information about weight shifts, moving holds and anticipation can be found here:
http://www.visualfulfillment.com/index.php?option=com_content&task=view&id=195&Itemid=34
Terms of the week:
-Timing
-Arcs
-Contact Pose
-Down Pose
-Passing Pose
-Push Off Pose
-Up Pose
-Twisting of Spine
-Overlap
-Slow in Slow Out
-Stride Length
-Beginning and End Pose
-Loop
Thesis Title : How to run off a cliff with style: Teaching emotion and empathy in character animation
After sending out the industry questions yesterday, I realized that I had to revisit my thesis title. The title as of today is:
How to run off a cliff with style: Teaching emotion and empathy in character animation
Wording is very important as it sets the tone for the project, and I realized that I was missing "empathy" in the title. Key definitions are below:
Empathy
1. Direct identification with, understanding of, and vicarious experience of another person's situation, feelings, and motives.
2. The projection of one's own feelings or emotional state onto an object or animal.
"empathy." The American Heritage® Stedman's Medical Dictionary. Houghton Mifflin Company. 02 Jun. 2007. <Dictionary.com http://dictionary.reference.com/browse/empathy>.
Emotion
1. A mental state that arises spontaneously rather than through conscious effort and is often accompanied by physiological changes; a feeling: the emotions of joy, sorrow, reverence, hate, and love.
"emotion." The American Heritage® Dictionary of the English Language, Fourth Edition. Houghton Mifflin Company, 2004. 03 Jun. 2007. <Dictionary.com http://dictionary.reference.com/browse/emotion>.
The Birds Have Flown : Industry Questions Sent Out
I sent out industry questionnaires last night to about 10 animators. The questions are below. The participating animators thus far are noted in the links section with an asterisk...Thanks guys for sharing your work and for helping me with my project.
There are 26 questions total. Many are fast and all are geared for a general overview of professional practices in the industry regarding animation character emotion.
Background:
* Where did you study animation? And how long have you been animating?
* Where do you currently work as an animator?
* What is your primary animation platform? And which software do you use most often?
* What props, toys or objects do you have around your work area to help with inspiration?
* Is there an animation that you have worked on that you are most proud of? Why?
Influence:
* Do you have a favorite animator that you continually draw inspiration from?
* In learning animation, do you have a favorite animation exercise that you consider invaluable? Please describe.
* What are your top 3 favorite animation DVD's? And what reasons do you have to make them the top of your list?
* Mickey Mouse or Bugs Bunny? If neither, who?
Industry Questions:
* Do you specialize in a particular type of animation (i.e. character, realistic, inanimate objects, animals, visual effects shots)?
* How much footage do you choose to work on at any one time (if you are able to choose), and how long do you give yourself to work on this footage?
* Animation is a complex process, what types of questions do you ask yourself in order to clarify what you are about to animate?
* After the above has been established, how do you go about animating?
* Which is your primary software, and is there a feature inherent in the software that you are using that you just love and that you cannot live without? What does it do?
* In what ways do you see the animation industry changing?
* What is the most difficult part of animation?
* What do you love most about what you do?
Animating Emotion:
* How important is emotion to your animations?
* Is there a technique or habit that you employ that helps ensure great emotion animation?
* Have you ever animated something, only to find that people felt something else other than what you had originally intended?
* Have you found a resource that has helped you in become better at animating character emotion?
Advice to Students:
* What is the biggest downfall students make when it comes to presenting their portfolio/demo reel?
* What is the biggest downfall students make when it comes to animating character emotion?
* What type of advice would you give students to improve their abilities in animating character emotion?
* The animation process is long and tedious, and its not unusual for the mind to wander. What do you do stay awake, sharp and focused on your work?
* In order to continue further study on the subject, would you recommend another animator who you know would be interested and available to answer these questions?
Tuesday, August 28, 2007
Interview with animators Bobby Beck, Shaun Kelly and Carlos Baena

A great interview conducted by Tim Fornica of some of the best animators in the industry. The interview took place at SIGGRAPH 2007. They talk about their website which helps promote and teaches character animation (Animationmentor.com) as well as their experiences in the industry.
If you are aspiring animator, its well worth your time. The interview can be watched by clicking the link below. Thanks Tim for posting!
http://one.revver.com/watch/369585/flv/affiliate/77944
Thursday, August 23, 2007
Animator Link Update

Just updated the links you see to the right.
These animators have inspired this project. I just sent out general inquiries to all of them to see if they would be available to answer a few questions about their animations.
Lots of fantastic work to the right by artists and animators with "dope fresh" skills.
Enjoy!
Friday, August 10, 2007
Week 5 : Walk Cycle Animation Critique
Today, we critiqued our walk cycles. Looked as if I didn't follow directions. I appreciated the honesty in order to acquire the tough skin. Below were common mistakes regarding the assignment, critiques for my assignment, and the midterm assignment, where the students were to animate a character run cycle in class. I think my midterm walk cycle of Igor turned out much better.
Walk cycle Critique Part I
Class Dailies, things to watch out for:
Common pitfalls and things to watch out for in this exercise.
Hitches in the root. Linear keys for smoothing.
Contact Pose – Straighter leg in front, bend in back foot so heel can raise.
Weight pose – back leg should be lifted. Toe of the ground. Bend spine here. Lift head to compensate spine bend.
No rotation in shoulder except in passing pose. For the most part it stays straight.
Weight shift on to supporting leg in passing pose.
Take Off pose Push toes to kick character higher.
Richard Williams pgs. 166
Clean up root. Push it up during pass pose and move it down on the weight pose.
Pat attention to bend in the spine.
Remember Overlap. Root first, then torso follows, then head. Segmented Delay.
Watch Sliding in Z axis of heel.
Use Controls to relax the hands. Not spread.
Contact Pose = Gate : Be sure this is an equilateral triangle.
For my animation:
Contact Pose – Straight Leg – Bend Back Leg.
Arc Arms
Take off pose more height
Pass Pose watch pointed Toe
Angle of head
Weight Pose – bent back leg.
MIDTERM
Animate a character walk in class. The students have a choice of a rigged character. They are to animate the character utilizing Rodri Torres’ website as a guide and they have two hours to complete it. The site can be found here:
here:http://rodri.aniguild.com/tuto_run/run_en.php
Sunday, August 5, 2007
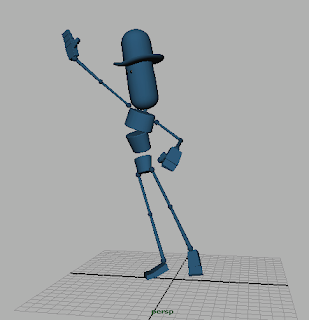
Blue Guy "Generi Rig" : by Andrew Silke
If you'd like to give animating emotion a shot, there are numerous free character rigs on the Highend 3D site. A very nice rig is the one by Andrew Silke and it features a pretty cool control system that is both visual and intuititve. Thanks guys for posting this online.
You can check the site by clicking the link below.
http://www.andrewsilke.com/generi_rig/generi_rig.html

You can check the site by clicking the link below.
http://www.andrewsilke.com/generi_rig/generi_rig.html
Saturday, August 4, 2007
Facial Features and Expression : by David Kalwick
 This week I conducted research on techniques and methods for a properly rigged face. This is important as it enables the animator to achieve emotion. The focus of my thesis however (and its something I still debate about), is not technical. Studying the nuances of a rig in order to manipulate the mesh could be an entire thesis on its own, we really don't have much time to cover the major platforms and therefore will only focus on the nontechnical, but practical aspects of generating emotion in characters, that can be used across all platforms including 2D animation.
i came across David Kalwick's book, "Animating Facial Features and Expressions". I thought it would be a nice place to start. I wanted to see how an expert who models and animates in CG and also, how he presents and executes the process for animating emotion. It is written for the intermediate to advanced level student, the same group that my thesis is targeted towards. The information is helpful and after reading it, I thought about perhaps putting together a class where this book would be the central text. I originally picked up the book in order to conduct research on properly rigged face and found other things that were quite helpful.
The book is divided logically, into three parts.
Part I:
Describes facial anatomy, muscles, the skull and most importantly, general proportions. Now I teach life drawing on a regular basis at the school and some of the tips he shares in order to remember facial proportion is quite clever. I also learned new terminology about the skull that I had not learned. These were:
- Nasion : The area between the eyes, above the nasal bone.
- Supraorbital Margin : I usually called these the orbitals, but now I have a name for the top brow ridge.
- Infraorbital Margin : The bottom ridge of the eye socket.
- Mental Protuberance : The part of the chin that sticks forward.
He also discussed the use of forensics' use of 3D to solve crimes, and talked about he difference between the male and female skull. The female skull is narrower, rounder at the top, its shorter, the chin and mandible is rounded, the supraorbital margin is not as large, and the cheek bones are not as large as a male's (zygomatic process).
The section continues with the nuances of the each facial feature, and describes how the muscles are manipulated. In conclusion, its important to know the muscles of the face so that an animator will know what point in the mesh to manipulate in order to achieve a realistic emotion.
This section has potential to be extremely technical, but its written in way that is easy to scan and understand, again its well written for his target audience.
Part II :
Talks about emotion and expression. More specifically, he talks about features such as the mouth (the foundation of the expression), the eyes and brows (used as modifiers) are used to create emotion. This section is filled with snapshots and illustrations that help to convey his idea.
Part III:
Is the the most technical part of the book. Here he discusses lip syncing, phonemes, recording dialogue, morphing, blendshapes (in both 3D Studio and Maya - Oh yeah, he's brave here, but he did it), animating spines, bones, correct pivot points, lattices, clusters, lots of stuff.
The best part about this section is that it includes appendices for 36 common emotions. These illustrations are charted out so they are easy to scan, and included with this is a basic shape breakdown and feature position suggestion in order to achieve that particular emotion, and covers a wide range from realistic to cartoon styles. I can see this being a really nice comprehensive guide on animating facial anatomy.
The book comes with also comes with a CD ROM that includes templates, movies about facial anatomy and animating the face.
Now, should I include information like this in my thesis? He's basically broken down the process from the structural aspects of emotion (skeletal and muscles) and demonstrates how these are formed and animated in CG. He's also created it so that it is a form of reference. Mine is similar but focuses more on acting methods.
At this point, including technical information about a properly rigged face, may be too much. I'll definitely point to this book as a main reference for setting up a facial rig in Maya and or Studio, or perhaps we just highlight the most common techniques in animating expression, like for example, sticking to diagrams of common expressions that animators can use as an online guide.
In conclusion, I was impressed with how the book was laid out, organized and how it presented the entire process of animating the face from anatomy to CG in a simple to understand reference.
Kalwick, David. "Animating Facial Features & Expressions". Boston, Massachusetts. Charles River Media. 2006
Friday, August 3, 2007
Jason Ryan Flip Book LInk

In this demo, you'll see Jason Ryan, animation director for Disney, use a program called Flipbook to create a simple 2D animation. This is much faster and he'll use it for approval. In this video, he demonstrates how he takes the footage generated in Flipbook and Maps it as an image sequence in Maya. Here, he uses the 2D Flipbook footage as reference for a more refined model.
I thought I'd post it as it shows the importance of drawing and 2D animation fundamentals during the creation of a CG animated sequence. Click the link below to see the demo.
Fire it up!
Assignment 4 : Walk Cycle
In this next assignment, we will be animating a simple character walk cycle.
Don't get too crazy, just animate the walk for now. Frame Count 24. The
notes below will guide you.
- 12 frames per step. We will have 12
- frames per
- step. Each of the
- poses below will be using three frames. 1
- keyframe and 2
- keyframes
- generated by the computer.
Below are the three main poses to help you animate a walk cycle.
- Contact pose - The point at which the feet touch the ground. Front toe up, back heel up.
- Weight Pose - The point at which the leg is holding the entire body's weight after the step.
- Pass Pose - Point at which the leg passes the other leg.
- Take Off - Point after Weight Pose, where the leg takes off from contact pose.
Contact Pose
- Heel to toe. 1 or two frames.
- Leg is straight
Take Off
- Back leg is straight.
- Highest Point of the pose.
Weight Pose
- Lowest point of the pose.
- Use 3 frames for each pose to create the 12 frame step.
- Watch Arcs for smoothness.
- Hand makes a figure 8 from top view.
- Head stays in place, but bobs.
- Foot makes and arc (reverse nike).
FORMAT:
Render out a front, side and perspective
views.
PROCESS:
Establish center of weight.
Move body
forward
Rotate Hip
Move weight (shift weight of figure) over support leg.
Rotate Shoulder
Position arms and hands.
Keyframe this pose
Set your frames to step. (RC timeline, tangent > step
Set your frame count to every third frame.
Repeat for the three remaining poses each is three frames apart.
For smoothness in Z. In Graph Editor, Select the middle points in Z
and delete for smoothness in the Z.
Locking Down legs.
Breaking
Joints to exaggerate. Check out Richard Williams Book on
breaking joints.
Drink Box Animation Notes:
I'm thinking about posting my animation on youtube so that I can post the examples on this blog. Animating the drink box was tough, primarily because my ideas seemed too complex. I realized that after realizing that it takes about 3 hours to properly animate the drink box fearfully jumping around. I found the assignment easier to tackle once I started simplifying.
Common mistakes students had with this assignment:
:: Keeping actions of the character intentional.
:: Being aware of the character's senses. He may see or hear something that might lead to an action.
:: Set up emotion from the very beginning of the scene.
:: Exaggerate the contrast of the emotions so that the ideas are clear.
:: Have strong posing to avoid "floaty" or "swimmy" movement.
:: Reverse pose C curves in animation add to contrast.
:: Remember contrast in timing. Add pauses to break up the timing of the animation, this gives the illusion the character is thinking, it also gives us the viewer a chance to understand what's happening.
:: Drag = approximately 6 frames.
Notes for my drink box animation.
:: People understood the march. This was tough. I made it so that it was clear that the movement was intentional and controlled as a soldier would move.
:: Have the box look slow to notice what's happening.
:: Hop to have body follow.
:: Have him look around.
:: Pepper the box with bullets and impact.
Friday, July 27, 2007
Pascual Animation Process
Below is a link to Ruel's animation process. He covers planning, stepping and cleanup in Maya.
Click here to view the tutorial.
Click here to view the tutorial.
Assignment3 : Drink Box Animation
Assignment 3 : Drink Box from randolfd and Vimeo.
Ball bounce 2
Below are notes, fixes and difficulties experienced by students from the previous assignments.
Things to watch out for regarding the two ball bounce.
5 frames for first drop of heavy ball.
Keeping overlap to compensate.
Remember forward momentum to represent forward motion.
Rotate ball after coming out of first squash.
Watch the X move more than the rotation (sliding). **
Flatten tangents in order to stay on surface.
Watch for steep arcs, keep arcs rounded.
Spacing of stretch before 1st squash, and stretch after 2nd squash frame be different. The second one should be greater.
Squashing before it hits the ground – squash starts too soon.
DRINK BOX ANIMATION
Animate box, show one emotion. In order to switch to another emotion, there must be conflict, then switch to second emotion. Watch gesture and timing. Remember bouncing ball timing. Anticipation before the move forward. Keep emotion in objects. Make believe that they are thinking.
Happy
Angry
Sad
Surprised
Excited
Anxious
Inquisitive
Embarrassed
Drunk
Confused
Abused
Tired
Loved
Depressed
Irritated
Constipated
Inspired
Annoyed
Disturbed
Conflict: Makes the scene more interesting and engages the viewer. It is marked by a struggle or confrontation. This usually follows a story arch. Conflict. There are three types of conflict. Conflict with Self, Others and Situation or environment. Suggest Conflict to make it more interesting, in this assignment. It may be interesting to have the conflict offscreen. After the conflict, be sure the character fails or succeeds. The box experiences conflict and then will either fail or succeed.
Timing of the exit of the character is different than entrance
As an exercise, see if you can sketch out a gesture pose for each brick emotion mentioned above.
IDEAS:
Standup Comedy Act – Cube appears. Tells a joke and bombs. OR succeeds. Spotlight
Guarding the doorway. Sees and intruder and goes to warn.
Drunk > cube falls >
DRINK BOX MODEL
Use locator to bring up channel box.
Be subtle
Be sure box has animation either hop or walk in order to travel across the scene.
Success of animation depends on:
Timing
Spacing
Squash and Stretch
Story
Posing
Gesture
Emotion
Success and clarity comes from the contrast of two emotions.
Contrast your timing and rhythm throughout the piece in order to prevent monotony.
ASSIGNMENT PARAMETERS:
6 second max.
720 x 486
Set up a camera and don’t move the camera.
Plot arcs.
Sketch it out.
Plan.
Staggering, Drag and Overlap requires 12 frames to show overlapping action and the die-out.
Stepping: Select your keys > RC > tangents > step
Thursday, July 26, 2007
Interview Questions
Below are possible questions posed to professionally working animators to gain insight into their methodologies and work methods in animating emotion.
Background:
Influence:
Industry Questions:
Animating Emotion:
Advice to Students:
Background:
- Where did you study animation?
- What are your top 3 favorite animation DVD's? And what reasons do you have to make them the top of your list?
- Mickey Mouse or Bugs Bunny? If neither, who?
- What is your primary animation platform?
- What toys do you have around your work area?
Influence:
- How long have you been animating and where do you currently work now?
- Do you have a favorite animator that you continually draw inspiration from?
- In learning animation, did you have a favorite animation exercise? Please describe.
Industry Questions:
- Do you specialize in a particular type of animation (i.e. character, realistic, inanimate objects, animals)?
- How much footage do you choose to work on at any one time, and how long do you give yourself to work on this footage?
- Before you jump on to the computer to animate, and realizing that you have approved storyboards, what type of personal planning do you do to prepare before animating?
- Animation is a complex process, what types of questions do you ask yourself in order to clarify what you are about to animate?
- Describe your animation process?
- Is there a feature inherent in the software that you are using that you just love and that you cannot live without? What does it do?
- In what ways do you see the animation industry changing?
- What is the most difficult part of animation?
- What do you love most about what you do?
Animating Emotion:
- How important is emotion to your animations?
- Describe the process you would take to get the best results?
- Have you ever animated something, only to find that people felt something else other than what you had originally intended?
Advice to Students:
- What is the biggest downfall students make when it comes to presenting their portfolio/demo reel?
- What type of advice would you give students currently entering the animation industry?
- The animation process is long and tedious, and its not unusual for the mind to wander. What do you do stay awake, sharp and focused on your work?
Friday, July 20, 2007
The Graph Editor
Adjusting handles in the graph editor:
By default, the handles in the graph editor are not weighted. Make them weighted so you can extend them.
From here, you can choose the tools circled below to break, combine or manipulate tangents.
By default, the handles in the graph editor are not weighted. Make them weighted so you can extend them.
- Curves > Weighted Tangents.
From here, you can choose the tools circled below to break, combine or manipulate tangents.

- MMB to translate.
- Shift to contstrain.
Assignment 1 :: Bouncing Ball
Assignment 1: Ball Bounce from randolfd and Vimeo.
In this assignment, I skipped the first task of animating a bouncing ball in 24 frames and it ended up shooting me in the foot. I tried to do a 450 frame animation of the ball, bouncing in and being excited caused him to jot in and out of the frame 3 times. Afterwards, he was supposed to slowly come in and deflate to represent an exhaustive state. The task was too much. I had not felt warmed up. I'm sure I could tweak the animation I completed, but it might be best to just start again. Doing the single ball bounce in 24 frames is a nice ease into the remaining assignments. I just completed it and I feel much better now. I will return to this assignment once I have a better idea/concept.
Below are some common mistakes and fixes made by other students in the class:
- Stretch of ball on descent happens too early.
- Incorrect contact with the ground plane.
- Add an extra frame of squash, keep it here at least two and at the most three.
- Punch or Pop occurs after squash. The distance between the stretch and the last frame of the squash should be greater than the distance between the first squash and stretch frames.
- Tops stop too abruptly. Flatten out tangents.
- More keyframes at the top of the motion than at the bottom.
- Be mindful of the frame count and height. If the height is shallow and there are a lot of frames, the animation will play slow.
- Practice flat and linear keys.
- Keep things simple. Plan your keys (70%). Animation = 30%.
- Cameron Myazake bouncing ball animation.
- Check out Richard William's tips on frame count.
- Soft landings. Create linear tangents to create impact.
List of Emotions
Below is a list of common emotions that when animated, will give you a good variety of assignments. To add additional variety, try animating them in different intensity levels from subtle (realistic) to exaggerated (cartoony).
The following emotions are:
- Shyness
- Disgusted
- Fear
- Surprised
- Joy
- Happy
- Anger
- Inquisitiveness
- Sadness
Hooks, Ed. "Acting for Animators". Portsmouth, NH. Heinemann. 2000.
Maya 8.5 Service Pack
Had problems firing up Maya 8.5 on my mac. Looks like there is a service pac and an unistaller patch that we have to use to get it to work. Thanks Ron.
I'll give it a try.
The link to both the patch and service pack can be found here:
http://usa.autodesk.com/adsk/servlet/ps/dl/item?siteID=123112&id=9627807&linkID=9242259
I'll give it a try.
The link to both the patch and service pack can be found here:
http://usa.autodesk.com/adsk/servlet/ps/dl/item?siteID=123112&id=9627807&linkID=9242259
Friday, July 13, 2007
Starting Back Again
This week was the first week of teaching at Ai after a nice vacation to Huntington Beach and San Diego. This quarter, I teach three Beginning Maya classes and I'm also sitting in on Ruel's 3D Character Animation class.
The character class will be the focal point from which to create my acting curriculum. I will be engaging in lots of the exercises I have planned for in my thesis. I'm looking forward to improving.
The character class will be the focal point from which to create my acting curriculum. I will be engaging in lots of the exercises I have planned for in my thesis. I'm looking forward to improving.
Friday, June 15, 2007
Creating an Abstract
Start first by identifying your thesis. This should be done in a single sentence.
Then answer your thesis by asking these questions:
Then answer your thesis by asking these questions:
- What is the problem or question that the work addresses?
- Why is it important?
- How was the investigation undertaken?
- What was found and what does it mean?
You should find the answers to questions 1 and 2 in your Introduction; the answer to question 3 will be a summary of your Methods; and the answer to question 4 will summarise your Results, Discussion and Conclusion.
Citation:
Monash University Online. 2003. Monash University 15, June 2007. <http://www.monash.edu.au/lls/hdr/write/5.11.html>
Subscribe to:
Posts (Atom)

